
Timelines
MAY 15, 2024| cericsonCategories
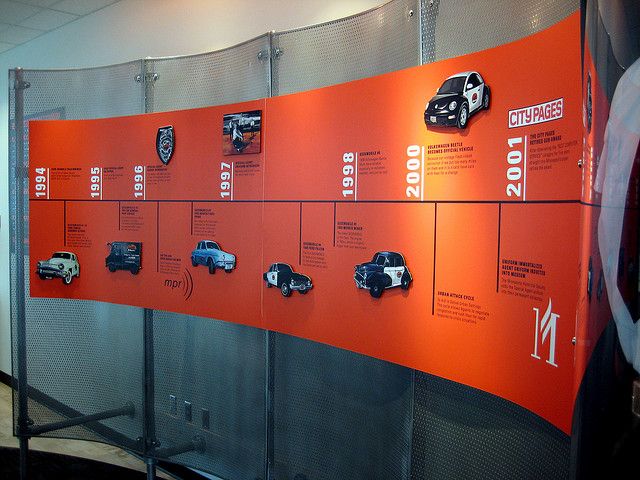
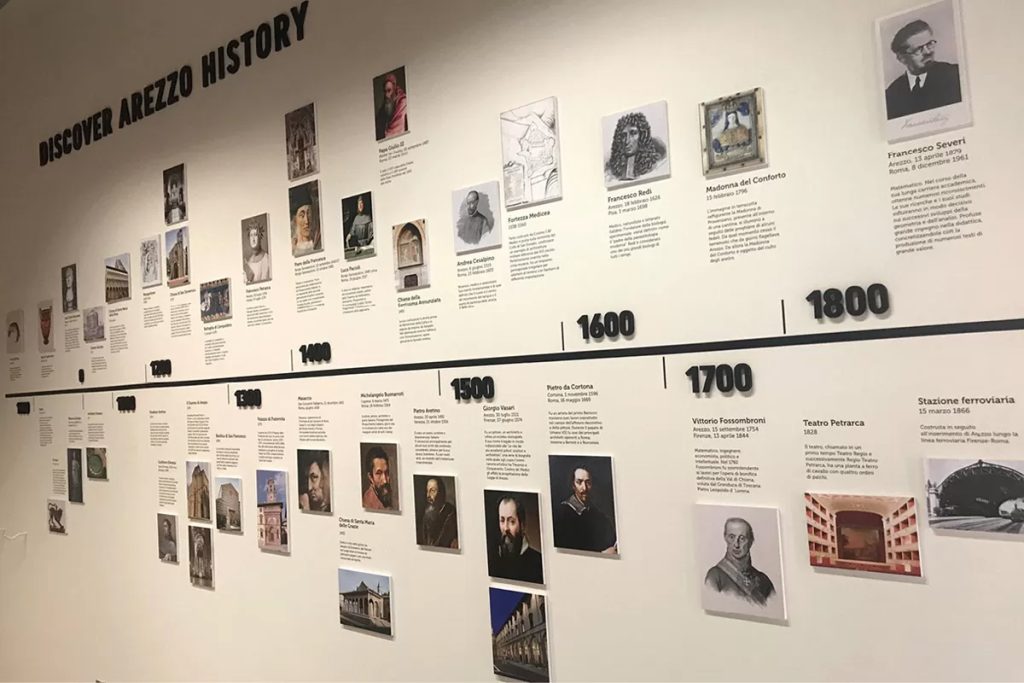
SignsTimelines can be as simple as an arrow and some dates, or a complex web of lines, photos, 3d elements, and anything else you can think of.
What is a timeline?
A timeline is a line in which you can mark the beginning and the end of a period of time and mark important dates along the way—generally done in chronological order.
Most of the timelines SpeedPro East Bay has done have been for businesses, so we usually start with the date the company was founded. Sometimes we’ll start with the founders’ birth and a brief history of their lives before they started the business. Or if it’s a group of founders; then where they met or thought of the idea of a company. College or a camping trip, etc. A cool thing to do is to start with a convergence of timelines of a bunch of founders.

How to get started.
Timelines are great ways to organize and present information in a chronological sequence. Whether for historical events, personal journeys, or a company’s history, a timeline can convey narratives in a clear and visually appealing manner. Here’s a step-by-step guide to help you create your own timeline:
1. **Define Your Purpose**: Before diving into the details, clarify the purpose of your timeline. Are you documenting historical events, tracking project milestones, or mapping out your personal achievements? Understanding your objectives will guide the content and structure of your timeline.
2. **Choose Your Format**: Timelines can take various forms, from traditional linear representations to more creative designs. Consider whether you prefer a vertical or horizontal layout, a digital or physical medium and whether you want to incorporate images, illustrations, or interactive elements.
3. **Gather Your Information**: Collect all the relevant dates, events, or milestones that you want to include in your timeline. This may involve conducting research, consulting historical sources, or compiling data from project management tools. Organize your information chronologically to ensure accuracy and coherence.
4. **Select Your Timeline Tool**: Depending on your preferences and technical skills, choose a suitable tool for creating your timeline. Options range from simple graphic design software like Canva or Microsoft PowerPoint to specialized timeline-making tools like TimelineJS or Tiki-Toki. Alternatively, you can create a physical timeline using poster boards, index cards, or a whiteboard.
5. **Design Your Timeline**: Begin by plotting the start and end points of your timeline, along with any major intervals or milestones. Then, add the individual events or dates along the timeline, spacing them out evenly for clarity. Use a consistent color scheme, font style, and iconography to maintain visual coherence. Consider incorporating images, icons, or symbols to enhance the visual appeal and convey additional context.
6. **Provide Context and Descriptions**: For each event or milestone, include brief descriptions or captions to provide context and explanation. This could include key facts, historical background, or the significance of the event within the broader narrative. Be concise yet informative, focusing on the essential details that help viewers understand the significance of each point on the timeline.
7. **Review and Revise**: Once you’ve completed your initial draft, review your timeline for accuracy, coherence, and visual appeal. Ensure that the chronological sequence is clear and logical, and that the layout is visually balanced. Make any necessary revisions or adjustments to improve clarity and readability.
8. **Share Your Timeline**: Once you’re satisfied with your timeline, consider how you want to share it with others. You can publish it online, print it as a poster or handout, or incorporate it into presentations or reports. If creating a digital timeline, explore options for embedding interactive features or multimedia content to enhance engagement.
9. **Seek Feedback**: Finally, solicit feedback from colleagues, friends, or peers to gather different perspectives and identify areas for improvement. Pay attention to usability, clarity of presentation, and overall impact. Use feedback to refine your timeline further and ensure that it effectively communicates your intended message.
By following these steps, you can create a timeline that not only organizes chronological information but also engages and informs your audience effectively. Whether for educational, professional, or personal purposes, a well-crafted timeline has the power to illuminate history, track progress, and tell compelling stories.
Let us help you create your timeline.